PRB: iHomeServer may not start iTunes automatically on reboot

A minority of users have reported that iHomeServer occasionally fails to restart iTunes after a system reboot.  This appears to be restricted to a subset of users who are running iTunes 10.6.x on a slow-ish server.

The current version of iHomeServer (2.1.x) waits 2.5 minutes for iTunes to start up prior to giving up.  This has been plenty of time in the past, however, the later version of iTunes starts up a bit more slowly so may affect a minority of users.

Fix:

If (and only if) you are suffering this issue, there is a simple workaround:

  • Log onto the server hosting iHomeServer; Choose Start / Control Panel / Administrative Tools / Services.  Find the 'bizmodeller iHomeServer (for iTunes)' service and right-click it, select 'Properties'.  On the 'General' tab, find the 'Startup type' drop down box and select 'Automatic (Delayed Start)'; click 'OK' and close the Services window.  Next time your reboot, iHomeServer should correctly restart iTunes.

Alternatively, please download our beta of iHomeServer 2.2.x which gives iTunes significantly longer to start-up so avoids this iTunes issue without the workaround


iHomeServer Pre-Release Available 2.2.1.0 - internet metadata tagging, interactive iTunes launching, faster start-up time

The next major release of iHomeServer is now in feature-freeze and available from our beta/pre-release download site.  Please note it is still going through additional testing; there will be a few minor releases to it before it is promoted to the main download site.

Screen shot:


This release has some very cool new features which we hope you will like:

  • Internet metadata lookup - the big feature is new internet metadata lookups.  Whilst iTunes does a great job of fixing metadata automatically for CD rips, etc, it doesn't touch TV/Movie files.  So, we've tried to make this as easy and useful as possible.  You don't want to spend hours tracking down the right metadata/artwork for a movie/video track; you want a quick streamlined search process.  iHomeServer now integrates with three of the leading metadata services - themoviedb.org, thetvdb.com and tagchimp.com. Metadata lookup hooks into the iHomeServer workflow in many ways:
    • On the metadata editor page, you can click 'Internet Search' to autopopulate metadata fields / artwork based on results from these services.
    • You can select a set of movies on either the Watch Folder view or iTunes View tab, right-click and select 'Auto-Tag'.  iHomeServer will then get the best-matched data based on filename or embedded track name and set the metadata to the file with no further clicks from you.
    • You can select all the episode in a TV season, right-click and select 'Auto-Tag'.  iHomeServer will guide you through a wizard to choose the TV series, season and then match episde numbers up against your file names.  Hit 'Finish' and it will auto-tag all the results and immediately update iTunes so that the results are available to your Home Sharing clients
    • Finally, you can switch AutoTagging on automatically for a Watch Folder.  Whenever iHomeserver detects a new movie has been added to a Watch Folder, you can configure Auto-Tagging to automatically best-match tag the movie with zero user involvement!
    • The metadata search *should* be multi-lingual - we would be very grateful for your feedback as to how well this works and what improvements are necessary
    • We're quite pleased with the user experience; hope you like it - of course, let us know your suggestions / feedback / improvements


  • "Interactive iTunes launch" - we have been promising this for a while, and this pre-release has the core functionality complete.  When you click the 'Start iTunes' button within iHomeServer Console, you are now given an option as to whether you want to start iTunes within iHomeServer or whether you want to start it interactively.  If you choose the latter, iHomeServer will open the full-fat iTunes interface under the same user you have configured the service to run.  And best of all, it is run within the same RDP session as the WHS Dashboard/Console, therefore you will be running a remote instance of your server's iTunes GUI within your WHS Dashboard.  When you have finished making any changes to iTunes, you can close iTunes, click Start iTunes under iHomeServer control and iHomeServer will restart iTunes in the background.


  • "Caching Playlists" - Caching Playlists has always been a bit slow; particularly for users with large libraries. On slow servers it could take 10-15 minutes.  We have rewritten this process entirely and now analyse the iTunes Library.xml file for playlist/track information instead of querying iTunes.  This has led to a massive performance boost when starting iTunes up under iHomeServer control.
There's also quite a few stability improvements and general bug improvements - see the beta page for more information.   We're also putting together on-line and in-app help; the beta includes about half of the documentation at the moment; this will be added to in future incremental updates.
 
So - if you want to try it out, please download it from the beta/pre-release download site. Please feedback all comments either via this blog or direct to [email protected]


Internet metadata lookup for Tv / Movies - request for feedback

We are soon to be releasing an update to iHomeServer that will perform metadata queries direct from online metadata services. The feature will allow one click setting of episode / movie titles, descriptions, cover art, etc, so should save people lots of time and avoid the need for other tools in the rip-to-watch workflow.

We currently have two services lined up - tagChimp and TheMovieDb.com. This post is really a request for feedback on whether iHomeServer users would like integration with any other Internet services?

Let me know! Either through a comment here, email ([email protected]) or tweet (@bizmodeller)

Availability of pre-release versions of iHomeServer

Did you know that pre-release versions of iHomeServer that include upcoming features that are still going through final testing are regularly available on our beta download page?

These are available to any user who wishes to download them, although they are still subject to the same 30-day trial as the production iHomeServer release.

The current features being tested include:

  • Significantly improved handling of media when iTunes is set to "copy added media to the iTunes Media library" - no more false failures showing up
  • Importing of iTunes Media Library XML files from other instances of iTunes - automatic matching of data with your the instance of iTunes run by iHomeServer.  iHomeServer will then update ratings, play counts, last play dates and playlist membership - this is a great easy way of copying other iTunes metadata across from a personal computer to your iTunes server without having to do a full iTunes folder migration.
  • Ability to change the credentials of user iHomeServer runs iTunes as from the 'Settings' dialog
  • Ability to run other applications when iHomeServer launches iTunes - configurable to run either before or after iTunes is launched
  • Added ability to alter "Part of compilation" metadata within the metadata editor
As with any pre-release software, please backup your iTunes library and media prior to installation just to be safe.
 
Please also let us know of any issues you encounter, suggestions for new features, or improvements to usability by emailing [email protected] 

HOWTO: Manually uninstall the iHomeServer Add-in on WHSv1

It is important when upgrading any add-in on Windows Home Server v1 that you uninstall the previous version of the add-in before copying the updated add-in file to the server's add-in folder and installing any newer version.  This is a long lamented and unfortunate design decision within WHSv1 which has fortunately been resolved in Windows Home Server 2011.

If you find yourself in the situation where you have attempted an upgrade without first uninstalling the previous version, you need to log into your server via RDP (Remote Desktop Connection) and manually uninstall iHomeServer from the Add/Remove Programs applet of your Control Panel.  Once uninstalled, you then need to use the registry editor (regedit.exe) to remove the relevant Add-In's registry key under HKEY_LOCAL_MACHINE\SOFTWARE\Microsoft\Windows Home Server\RegisteredAdditions\

If you require step by step instructions, please look at this blog which gives an example for another add-in.  Simply follow these instructions, but apply it to iHomeServer instead of their example add-in:

http://www.homeserverland.com/wiki/index.php/Windows_Home_Server_Add-in_Manual_Uninstall_Instructions

If you have any further difficulties, please feel free to email support at [email protected]


HOWTO: Fix the "Add-in is already installed" error message on WHS v2011

iHomeServer v2 updates (for Windows Home Server 2011) should normally be installed simply by downloading and directly running the iHomeServer.wssx file from the Downloads area of the bizmodeller.com web site.  The installation process will automatically uninstall any previous versions and update your system to the latest version.  Any settings will be preserved including the registration of which user account will run the iHomeServer service.

However, once in a while, we receive a support ticket from a user who has had problems upgrading to the latest version. Typically the error says "The Add-in is already installed":


This is usually because the user has tried to remove iHomeServer from WHS by using Control Panel's Add/Remove programs instead of using the WHS Console - this can be confusing because this was the way you had to remove iHomeServer v1.  However, you never need to uninstall iHomeServer v2 from either WHSv1 or WHS2011 by using Add/Remove programs.  Instead, please click the appropriate 'Uninstall' button from the WHS Console.  This can be found in 'Settings' under the Addin link in WHSv1 or on the main Add-in tab in WHS 2011.

If you have uninstalled iHomeServer via Add/Remove programs on WHS 2011, you will likely receive the above error message if you then try to install a new version of iHomeServer via the WHS Console.

To resolve this, simply log back into the the WHS 2011 Console, click the Add-in tab, click 'iHomeServer' and click Uninstall (even though you have already uninstalled iHomeServer from Control Panel Add/Remove programs).

This will unregister the iHomeServer addin with WHS and allow you to reinstall the latest version.


New: WHSv1 iTunes Installer - free tool to help install iTunes on WHS v1 without Orca!

We've had a lot of emails from users of Windows Home Server v1 who have tried to install iTunes on their servers only to be met with an error saying that the Apple Mobile Support requires Windows XP Service Pack 2 or higher.

There are many posts on many forums which give detailed instructions on how to get around this by using Orca to edit the Apple MSIs and remove the installation launch conditions.

We have put together a small free tool that automates this into a single click.  Once you have downloaded the  "WHS iTunes Installer", you will be asked to point the tool to the iTunes Setup file you downloaded from the Apple Web Site (iTunesSetup.exe).  The tool will then start the installation and remove the Service Pack 2 condition on-the-fly when required.  There is also support for upgrades, if you use the Apple Software Updater to download iTunes instead.

Download by clicking the link below ...  and please post feedback to this blog!


Download WHSv1 iTunes Installer (32-bit) - 25.6kb


Steps:

1. Welcome Page

Select "Option 1" if you are downloading directly from the Apple website for a new installation.  Select "Option 2" if you already have the separate iTunes MSIs in a folder somewhere and you just need to patch the AppleMobileSupport.msi


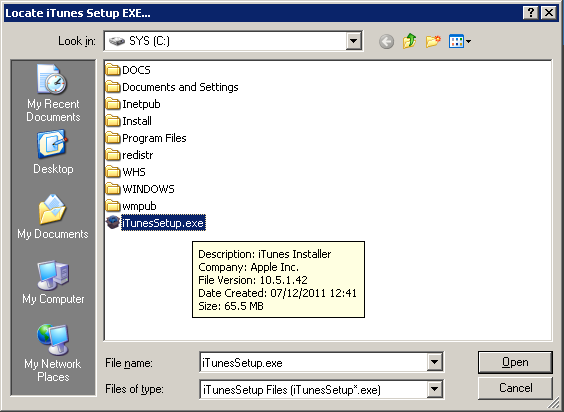
2. Select iTunesSetup.EXE

Assuming you chose Option 1, you will then be prompted to select the iTunesSetup.exe file that you downloaded from the Apple web site:


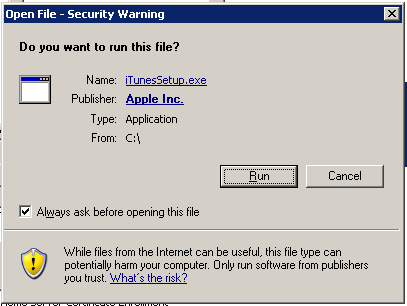
3. Installation ....

The tool will now launch the Apple installation program so click 'Run' to start the process:
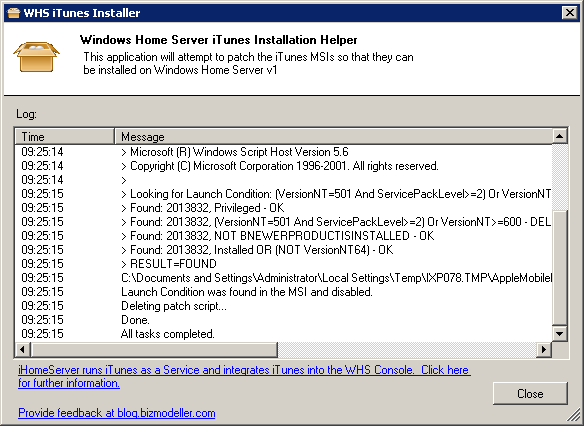
4. Patching ....

The tool will monitor the installation in the background for when the iTunes setup program has extracted the MSIs.  When the MSIs are available, the tool will automatically patch the AppleMobileDeviceSupport.msi in the background:

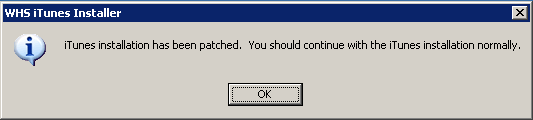
5. Patching Complete!

The tool will notify when patching is complete:


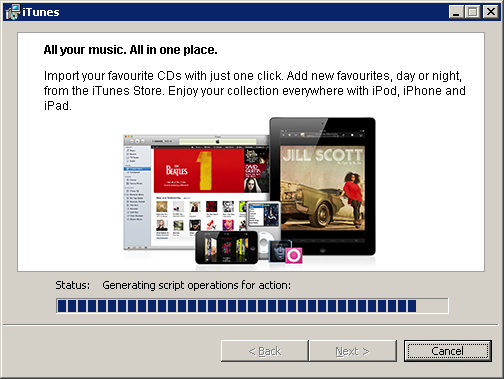
6. Continue iTunes installation....

The iTunes installation should now be continued normally:


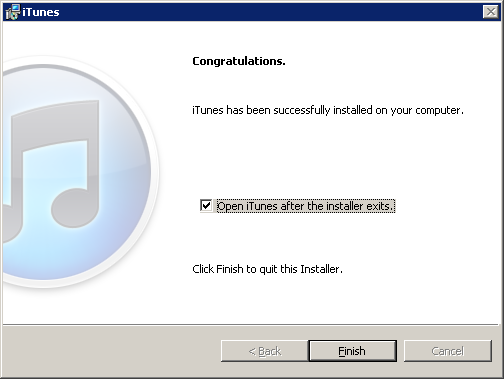
7. iTunes successfully installed!

If all went well, iTunes will now be successfully installed on your Windows Home Server v1 server:


Please let us know how you get on with the tool by posting comments below!

How to use iHomeServer with network drives or DriveBender disk pools

We have had quite a few users recently who have been unable to get iHomeServer to index content on network drives or local DriveBender storage pools.  The symptoms of this are that you can add and view files in iTunes that are stored on a remote / network or DriveBender drive when you are running iTunes interactively, however, when you run iTunes via iHomeServer then you can no longer add new content and existing content may not be available within iTunes.  Some users have also had problems seeing cover art and other metadata when they have pointed their iTunes to an iTunes library on a network drive.  You may see these symptoms immediately, or after a reboot or even intermittedly.

We posted a blog post a while ago about File Not Found errors similar issues and it is the same root cause problem here.

Windows Services cannot reliably see mapped network drives.  There are many Microsoft articles explaining why, but in essence, any network drive letter is tied to a Windows user session and is not guaranteed to be available to services which run in their own user sessions.  As iHomeServer runs iTunes as a service, it cannot reliably see mapped network drives.

The simplest way around this is to use fully qualified UNC file naming conventions when adding media to iTunes or when setting up Watched folders in iHomeServer.  For example, instead of adding content from your f:\ (mapped to \\mynas\media), add it directly from the UNC path \\mynas\media.  You can do this either with the server name or IP address (eg \\172.18.1.1\media).

One point to note is authentication.  You may have had to specify an account to access a network resource with when you set up your mapped network drive.  When you use the UNC path, you cannot specify the user account to use.  If your network resource (eg NAS or networked file share) requires authentication the easiest thing to do is to set up an account on the networked resource with the exact same username and password as the account you are using to run iHomeServer.  Authentication will then be transparent and you can access your resources.

Note that some of our users are using drive pooling software, such as DriveBender.  Some of these packages (including Drive Bender) present the storage as a file share instead of a physical drive.  Therefore users tend to map a drive letter to the local file share and access their DriveBender storage via what is effectively a mapped drive letter.  Exactly the same problem occurs in this case - the mapped network drive is still not available to iHomeServer or iTunes.  As above, the workaround here is to use the UNC path to your DriveBender shared folder (eg \\Server\DriveBenderMediaFolder) instead of using a mapped drive letter.

Thanks particularly to one of our users, Jan, for helping get DriveBender working with iHomeServer.

NB: iHomeServer Version 2 validates that the server can see the Watch Folder successfully before allowing you to add a new Watch Folder therefore this should be a lot clearer in this version!


iHomeServer Version 2 - now with native Windows Home Server support - Sneak Preview!

We are pleased to announce that that we are currently in final testing of iHomeServer v2 which is a major upgrade for the iHomeServer application. This will be a free upgrade for all existing registered users.

If you would like to beta test this version please email us at [email protected]


We will announce further details shortly, however, as a sneak preview, the following functionality will be available:

  • Slick User Interface - view Watch Folders, status of indexing, track data, review Cover Art, etc
  • Native integration with the WHS Management Console - support for both Windows Home Server v1 and Windows Home Server 2011
  • View your whole iTunes library and playlists directly within the Windows Home Server Console!
  • Standalone GUI Console for non-WHS Windows editions 
  • Native 64-bit code on appropriate Operating Systems (inc WHS 2011)
  • Manual rescanning of folders or files on demand through the User Interface
  • Different scan modes - watch, poll or manual - available per Watch Folder
  • Essential iTunes playlist management from within the console (inc within the WHS Management Console) - add/remove tracks from playlists, create/delete playlists, etc
  • Metadata editing of iTunes tracks - just like the 'Get Info' button within iTunes
  • Improved set up process - including validating that iTunes or QuickTime is installed
  • Automatic iHomeServer upgrade checking (optional)


 We are currently beta testing this version. If you would like to participate in the beta test programme for this version please email us at [email protected]

How to synchronise your iTunes purchases from one iTunes to another iTunes

When you set up a brand new iTunes media server, you will typically be starting with a blank media library.  Many people will also have another copy of iTunes, say, on a laptop, and they'll use this one to download new content the iTunes store.  How can your server and laptop iTunes installations talk together?


One of the simplest methods is to use iTunes "Home Sharing".  This blog shows how to set this up to:

(a) copy your existing media from your iTunes laptop to your iTunes media server

(b) set up your media server to automatically pull new purchases from your iTunes laptop

Step by step

Setting up Home Sharing

  1. Start iTunes on your laptop
  2. On the Advanced menu, choose "Turn On Home Sharing", the following window will appear: 
  3. Enter your Apple ID and password and press 'Create Home Share'
  4. You'll see a message saying that Home Sharing has been turned on
  5. Go to Edit / Preferences and choose the General tab:
  6. Enter a name in the "Library Name" text box to help identify each of your libraries
  7. Then click on the "Sharing" tab and click the 'Share my library on my local network' check box:
  8. That's the laptop done, now, log on to your iTunes server and repeat the same steps as above (if you are running iHomeServer, remember to stop the service first so you can open a copy of iTunes interactively.)

Setting up automatic transfer of purchases from your laptop to your server

      1. Whilst still on the server, you should now see your laptop's library appear in the SHARED area:
      2. If you want new purchases copied across automatically, left click your laptop's library - it will take a couple of seconds to load
      3. At the bottom right corner of the iTunes screen, a 'Settings...' button will appear. Click it and the following dialog will appear:
      4. In this dialog, select which types of media you want to automatically copy to your server when it detects changes on your laptop
      5. If you are using iHomeServer, you can now close iTunes and restart the iHomeServer agent - iTunes will start automatically in the background

Copying your existing purchases from your laptop to your server

      1. The steps above should mean that new purchases get transferred, however, your existing media will still only be on your laptop
      2. Still on your server, navigate through your 'Laptop shared library' and find the media that you want to transfer (eg click on a playlist, or the 'Music' library)
      3. Select all the items you want to transfer (or press Ctrl+A to select everything)
      4. Then drag and drop your selection over to the relevant area of your server's library (at the top left of the iTunes window) - make sure your mouse pointer has a '+' sign indicating a copy
      5. iTunes will start copying your existing media from your laptop to your iTunes Server

Enjoy!