Filed under iHomeServer , iHomeServer
When you install iHome Server for iTunes, you specify the user account under which you wish iTunes to run. Of course, you can use your normal Windows account to do this, in which case, when prompted, just enter your account name in the form COMPUTERNAME\USERNAME, eg:
WIN7-COMPUTER\Joe.Bloggs
Enter your Windows logon password, or if you don't, leave the password fields blank.
However, it makes sense to set up a brand new user to act as your system iTunes account. In this case, follow these steps which are applicable to Windows 7. If you are using a different operating system, then there may be minor variations:
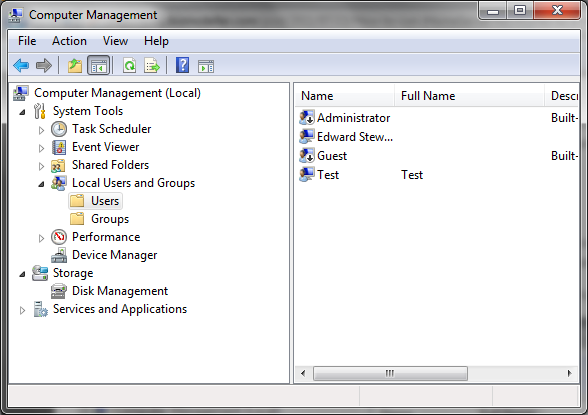
1. Go to the "Computer Management" applet which you can find under Control Panel / Administrative Tools:
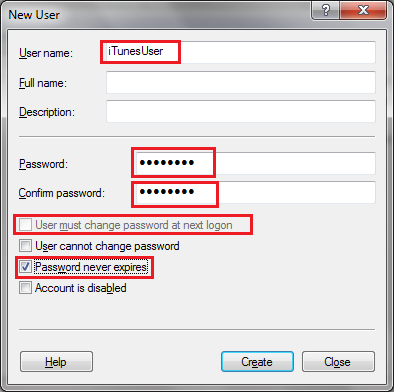
2. Create a new user account for your iTunes Home Server, specifying a password. Ensure you uncheck 'user must change password on next logon' and make the account's password never expire:
3. Now comes the tricky bit. Default Windows security prohibits non adminstrative accounts from creating cross-process calls to COM objects unless the code is running interactively. Because iHomeServer runs as a Windows Service, under the account you have just created, you will get errors in the event and error log when you start iHomeServer because it will not be able to access the iTunes application. The errors will look like this:
15/07/2011 18:11:49 FATAL ERROR: Cannot create hook to iTunes - System.Runtime.InteropServices.COMException (0x80080005): Retrieving the COM class factory for component with CLSID {DC0C2640-1415-4644-875C-6F4D769839BA} failed due to the following error: 80080005.
at AddLibraryToiTunes.Program.DoIncremental()
15/07/2011 18:11:49 Stopped service; iTunes killed
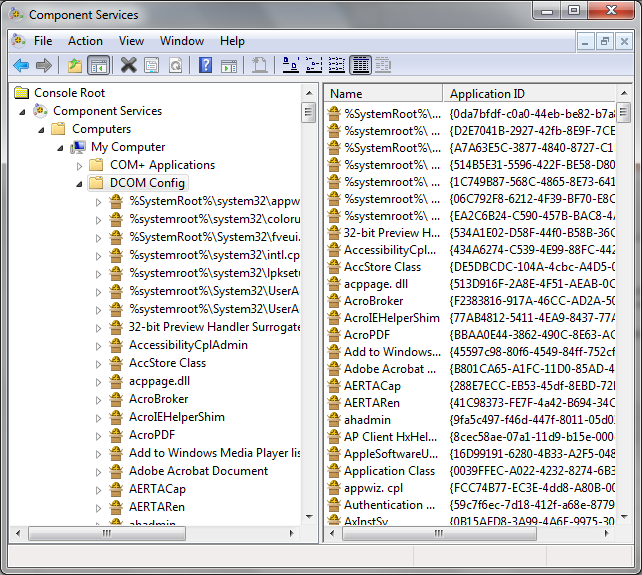
4. To get around this, we need to change some permissions. Open up 'Component Services', again from the Administrative Tools folder of Control Panel. Right click the shortcut and click 'Run as administrator' to ensure you are running as an admin.
5. Click down the tree as follows : Console Root / Component Services / Computers / My Computer / DCOM Config
6. Click the View, and click 'Detail'. Your screen should look like this:
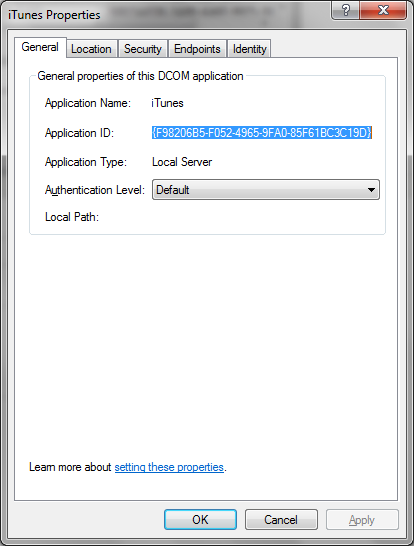
7. Scroll down the list until you find "iTunes". The GUID should be {F98206B5-F052-4965-9FA0-85F61BC3C19D}
8. Right click this item and click 'Properties':
9. On the "Security" tab, click "Customise" for "Launch and Activation Permissions". Then click 'Edit...'
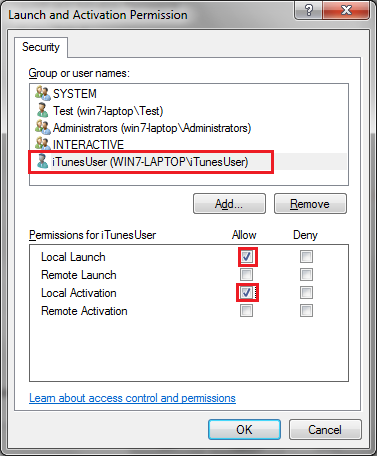
10. Click 'Add', then search for the iTunes user you created in step 2. Click 'OK', then ensure that Allow Local Launch and Allow Local Activation are both set as follows:
11. Click 'OK' then do the same for "Access Permissions". Add your iTunes user and ensure Local Access is ticked.
12. You then need to repeat steps 8 through 11 for the component "iPodService". This GUID should be {250DD19F-6E7F-4BA3-9E1B-69E6CDC52F30}
13. Click OK and close Component Services
14. Before you start the service, ensure you have logged on locally as your new iTunes account and set up iTunes as per the setup guide here.
15. Finally, go to Control Panel and the Services applet. Find the 'bizmodeller iHome Server' service and change the permissions to use your iTunes account. Then restart the service
iTunes should now be running under a dedicated iTunes account that does not need to be a member of the administrators group!
44a4453a-5e76-4f29-b3f1-de147f026b4a|0|.0